Tuesday, June 25, 2013

Fried Zucchini

Many vegetable gardens in my part of Ohio was started a little later than usual due to the cold weather, at least later than last year when it was unseasonably warm. We have been eating spinach and lettuce for several weeks now and a few peppers, but nothing else.

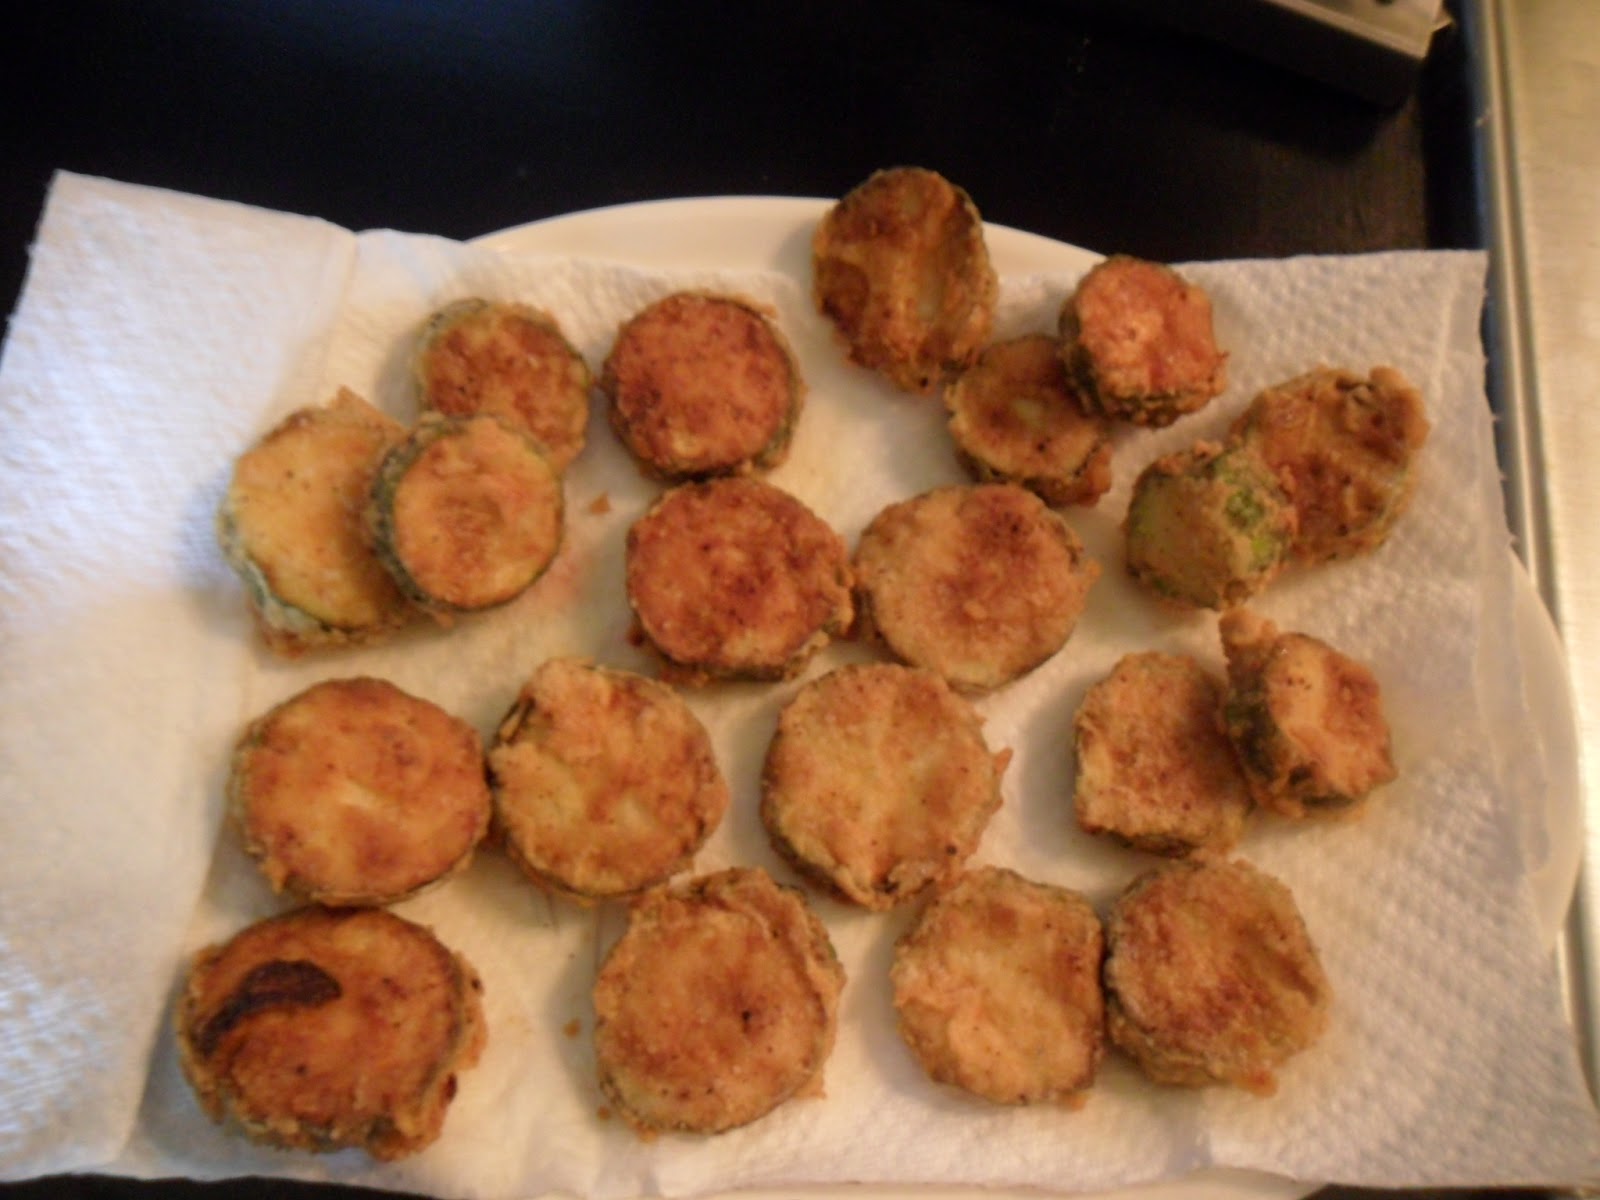
Today, I was able to harvest three zucchinis and I decided to fry them up as a pre-dinner, hold-me-over snack. I know, I know. Why grow a garden for healthy eating if you just turn around and fry the veggies? Because fried zucchini is sooooo good! And it has to be better than anything you would get in a restaurant.

I use small zucchinis that have not started to develop their seeds yet. I slice them about 1/4 to 1/3 of an inch thick (you choose however you prefer them). I dip them in a beaten egg and plunge them into a flour mixture. My mixture is a little different every time I make them. Tonight it was flour, Cajun seasoning, salt, garlic powder, and lemon pepper seasoning. I like mine a little spicy so I put more Cajun seasoning than anything else. I then pan-fried them on the stove making sure not to crowd them in the pan. I used tongs to turn them when the first side was golden brown and put them on a paper towel-lined plate. I had some buttermilk ranch dressing in the fridge and used that as a dip; hubs opted for ketchup.

Sometimes I double dip my slices using milk and bread crumbs for the final coating. There is no right or wrong way to do this. I usually dip them once, so you can still taste the zucchini.


I have summer yellow squash that looks like it might be ready tomorrow night and a few bell peppers to make my almost famous "Creamy Cajun Chicken Pasta."

Sunday, June 23, 2013

Auctions and a New Sofa

What a week! I went to two auctions, hubs and I had a grill-out with a friend at our place, we had a mid-week dinner out, I had an all-day family visit, and I am slowly (but surely) scraping glue off wood floors in the "den."

The last month or so has been the greatest for me and the auction scene. I don't know what it was.....I was just not in the "mood" or there were just bad "pickings" all around the area. But that changed this week.

Although the mid-week auction only produced two groupings of china, one was superior being a set of six fish plates and matching platter from Bavaria.

Yesterday's auction yielded a high-quality sofa from Smith Brothers of Berne, Indiana that is in excellent condition looking extremely close to new. And is it HEAVY! thankfully, a nice young man helped me get it into the truck I had parked at the loading dock area. I also scooped up a makeup table to "French up" for my daughter and several partial sets of china.

Below are a few pics of the sofa. Although not exactly what I would pick out for the den, I couldn't pass up the deal.


Friday, June 14, 2013

Strawberry Sherbet and Strawberry Yogurt Cake

Last year I planted 50 (yes, 50) "hardy" northern European strawberry plants. Well, they weren't that hardy, because about twenty of them died over the winter, even with being "strawed." And the ones that did survive, did not produce that many strawberries. If I'm lucky and beat the critters to the ripe ones, I may get three a day.

But have no fear, my farmer friend is here. I have had three large batches of strawberries from her place. The first batch became my snack for a couple of days. The second batch became strawberry buttermilk sherbet, and the third batch became strawberry yogurt cake.

I used a modified recipe last year for berry sherbet, but I could not remember how I made it. I know I wrote it down, but I don't know where I put it. I did a quick search and found this which tastes just like it. I changed out the half-and-half with heavy cream, because that is what I had in the fridge. It is quite refreshing, and the buttermilk adds a little tang to it. I use my electric Cuisinart ice cream maker, but a friend of mine uses lidded containers in the freezer. She stirs it every 15-20 minutes until firmly frozen.

My favorite recipe is the strawberry yogurt cake that my friend Sandy had pinned on her Pinterest page. I made it last year and loved it. I made it again this year and changed one thing. Since the Greek yogurt I could find at my country market came in 6 oz. containers (I needed 8 oz.), I added 1/4 cup of heavy cream and used just one of these 6-oz. containers of Greek yogurt. The recipe is http://www.aspicyperspective.com/2010/05/farmstand-fresh.html. It is delicious!

Sorry for the lack of pics, but by the time I realized I should take them we had already made the dishes  unpretty.

Thursday, June 6, 2013

1940s China Cabinet Makeover

Today I completed the china cabinet project I started this past Tuesday. I already have two 1940s cabinets in the dining room but could not pass this one up for the price. It was nicked up on the bottom edges and had a few scratches but had lovely wavy glass in the top and was quite sturdy. I bought it with plans of painting it and putting it in the front entryway.

I have recently been reading about chalk paint and how expensive it is (and not available just anywhere). It is available in an antiques town about 20 minutes away from me, but I am pretty tight when it comes to that. Instead, I decided to make my own using one of the many recipes I found on others' blogs. The recipe I ended up using was: 5 tablespoons plaster of Paris + 5 tablespoons water.....mix well. Then add about two cups of satin latex paint (without primer). I used the $24.99 Olympic. Mix slow but thoroughly.

Before I made anything up and started painting, I used painters' tape to tape off the glass and the areas I did not want to paint. I then lightly sanded with a fine-grit sponge sander (I had one already from sanding patches on walls). The finish was so "slick" on this piece, I wanted to make sure the paint had something to bite. Normally, you do not need to do this when using chalk paint.

I used a small cabinet roller for the large portions of the cabinet and a small, average quality paint brush for the tight spaces. I used a free makeup brush for the very smallest areas. ( I always to this even when painting a room....they work great for tight spaces and nooks and crannies.)

I gave it a second coat the next day.

On the third day (today), I distressed lightly with sandpaper and then used Johnson paste wax to cover the entire piece. Forty minutes later I buffed it out.

Now, I need to find a dresser for my daughter's new place.


Above are the "before" and "after" pics. I painted it right there in the entry way after putting newspapers under it and putting an old sheet down for a drop cloth.

I left the inside back stained, because I plan on putting antique English ironstone finds in there. I have also ordered a "puck" light for the inside top.

I have a set of wooden candlesticks that I want to paint and distress as well, just not white. So, I'll have to stop at Lowe's tomorrow and see if they haven't any "oops" paint. If not, I'll buy a sample jar.


Monday, June 3, 2013

Feta & Spinach Stuffed Chicken

I'm back. Today is the first Monday of my summer holiday and I am loving it. I have no place I must be, no time constraints of when I make it down town to the post and grocery, no makeup, no straightening my hair...you get the picture. However, the dogs think that since I am home all day they can be taken out for walks once an hour.

Anyway, I have vowed to make some new dishes this summer and last night was the first. First a little story about why I picked it. Last summer, my garden spinach did fantastic and we were having spinach salad almost nightly in addition to the little bit I put in the freezer. This year, it is doing just as well and I decided not to always use it in salad (plus, I have several varieties of lettuce that are doing quite well for that).

The original recipe came from here, but I changed it up a bit.

Ingredients
1/2 cup mayonnaise
3/4 - 1 lb fresh baby spinach
8 oz. block of light feta, crumbled (I love Trader Joe's)
1 tablespoon chopped garlic (I always have store-bought in a jar in my fridge)
4 skinless, boneless chicken breasts (I used two "giant" breasts cut in half)
4 slices of prosciutto


Directions
  1. Preheat oven to 375 degrees F (190 degrees C).
  2. Chop or tear spinach into small pieces and saute in a very small amount of oil over medium for a few minutes (or steam). Blot any excess moisture before adding to mix in step 3.
  3. In a medium bowl, mix mayonnaise, spinach, feta cheese, and garlic until well blended. Set aside.
  4. Carefully butterfly chicken breasts, making sure not to cut all the way through. Spoon spinach mixture into chicken breasts. Wrap each with a piece of prosciutto, and secure with a toothpick. (I didn't use toothpicks and they stayed together.)Place in shallow baking dish. Cover.
  5. Bake in the preheated oven for 1 hour, or until chicken is no longer pink in the center and the juices run clear. An instant-read thermometer inserted into the center should read at least 165 degrees F (74 degrees C).
Next time I make this I may leave out the mayo and/or add some bread crumbs to the mixtures. I've also thought about flattening the breasts first to thin them a little to reduce the cooking time.

I took a few pics, but we started eating before I got the final photo!